Robohub.org
Create a ROS sensor plugin for Gazebo

There are magnificent tutorials about how to create plugins for Gazebo in the GazeboSim webpage. There are even some tutorials about how to create plugins for Gazebo + ROS, which show that there are several types of plugins (world, model, sensor, system, visual), and indicate how to create a plugin for a world-type plugin. But I recently I needed to create a plugin for a light detector and couldn’t find a concrete example. Here’s a how-to post showing you how I did it.
How to: light sensor plugin in Gazebo
Following the indications provided at the answers forum of Gazebo, I decided to build a very simple light detector sensor based on a camera. Instead of using a raytracing algorithm from lights, the idea is to use a camera to capture an image, then use the image to calculate the illuminance of the image, and then publish that illuminance value through a ROS topic.
Since the plugin is meant to be used with ROS, the whole plugin should be compilable using ROS environment.
Creating a ROS package for the plugin
First we need to create the package in our catkin workspace that will allow us to compile the plugin without a problem.
cd ~/catkin_ws/src
catkin_create-pkg gazebo_light_sensor_plugin gazebo_ros roscpp
Creating the plugin code
For this purpose, since we are using a camera to capture the light, we are going to create a plugin class that inherits from the CameraPlugin. The code that follows has been created taking as guideline the code of the authentic gazebo ROS camera plugin.
Create a file called light_sensor_plugin.h inside the include directory of your package, including the following code:
#ifndef GAZEBO_ROS_LIGHT_SENSOR_HH
#define GAZEBO_ROS_LIGHT_SENSOR_HH

#include <string>

// library for processing camera data for gazebo / ros conversions
#include <gazebo/plugins/CameraPlugin.hh>

#include <gazebo_plugins/gazebo_ros_camera_utils.h>

namespace gazebo
{
class GazeboRosLight : public CameraPlugin, GazeboRosCameraUtils
{
/// brief Constructor
/// param parent The parent entity, must be a Model or a Sensor
public: GazeboRosLight();

/// brief Destructor
public: ~GazeboRosLight();

/// brief Load the plugin
/// param take in SDF root element
public: void Load(sensors::SensorPtr _parent, sdf::ElementPtr _sdf);

/// brief Update the controller
protected: virtual void OnNewFrame(const unsigned char *_image,
unsigned int _width, unsigned int _height,
unsigned int _depth, const std::string &_format);

ros::NodeHandle _nh;
ros::Publisher _sensorPublisher;

double _fov;
double _range;
};
}
#endif
As you can see, the code includes a node handler to connect to the roscore. It also defines a publisher that will publish messages containing the illuminance value. Two parameters have been defined: fov (field of view) and range. At present only fov is used to indicate the amount of pixels around the center of the image that will be taken into account to calculate the illuminance.
Then create a file named light_sensor_plugin.cpp containing the following code in the src directory of your package:
#include <gazebo/common/Plugin.hh>
#include <ros/ros.h>
#include "/home/rtellez/iri-lab/iri_ws/src/gazebo_light_sensor_plugin/include/light_sensor_plugin.h"

#include "gazebo_plugins/gazebo_ros_camera.h"

#include <string>

#include <gazebo/sensors/Sensor.hh>
#include <gazebo/sensors/CameraSensor.hh>
#include <gazebo/sensors/SensorTypes.hh>

#include <sensor_msgs/Illuminance.h>

namespace gazebo
{
 // Register this plugin with the simulator
 GZ_REGISTER_SENSOR_PLUGIN(GazeboRosLight)

 ////////////////////////////////////////////////////////////////////////////////
 // Constructor
 GazeboRosLight::GazeboRosLight():
 _nh("light_sensor_plugin"),
 _fov(6),
 _range(10)
 {
 _sensorPublisher = _nh.advertise<sensor_msgs::Illuminance>("lightSensor", 1);
 }

 ////////////////////////////////////////////////////////////////////////////////
 // Destructor
 GazeboRosLight::~GazeboRosLight()
 {
 ROS_DEBUG_STREAM_NAMED("camera","Unloaded");
 }

 void GazeboRosLight::Load(sensors::SensorPtr _parent, sdf::ElementPtr _sdf)
 {
 // Make sure the ROS node for Gazebo has already been initialized
 if (!ros::isInitialized())
 {
 ROS_FATAL_STREAM("A ROS node for Gazebo has not been initialized, unable to load plugin. "
 << "Load the Gazebo system plugin 'libgazebo_ros_api_plugin.so' in the gazebo_ros package)");
 return;
 }

 CameraPlugin::Load(_parent, _sdf);
 // copying from CameraPlugin into GazeboRosCameraUtils
 this->parentSensor_ = this->parentSensor;
 this->width_ = this->width;
 this->height_ = this->height;
 this->depth_ = this->depth;
 this->format_ = this->format;
 this->camera_ = this->camera;

 GazeboRosCameraUtils::Load(_parent, _sdf);
 }

 ////////////////////////////////////////////////////////////////////////////////
 // Update the controller
 void GazeboRosLight::OnNewFrame(const unsigned char *_image,
 unsigned int _width, unsigned int _height, unsigned int _depth,
 const std::string &_format)
 {
 static int seq=0;

 this->sensor_update_time_ = this->parentSensor_->GetLastUpdateTime();

 if (!this->parentSensor->IsActive())
 {
 if ((*this->image_connect_count_) > 0)
 // do this first so there's chance for sensor to run once after activated
 this->parentSensor->SetActive(true);
 }
 else
 {
 if ((*this->image_connect_count_) > 0)
 {
 common::Time cur_time = this->world_->GetSimTime();
 if (cur_time - this->last_update_time_ >= this->update_period_)
 {
 this->PutCameraData(_image);
 this->PublishCameraInfo();
 this->last_update_time_ = cur_time;

 sensor_msgs::Illuminance msg;
 msg.header.stamp = ros::Time::now();
 msg.header.frame_id = "";
 msg.header.seq = seq;

 int startingPix = _width * ( (int)(_height/2) - (int)( _fov/2)) - (int)(_fov/2);

 double illum = 0;
 for (int i=0; i<_fov ; ++i)
 {
 int index = startingPix + i*_width;
 for (int j=0; j<_fov ; ++j)
 illum += _image[index+j];
 }

 msg.illuminance = illum/(_fov*_fov);
 msg.variance = 0.0;

 _sensorPublisher.publish(msg);

 seq++;
 }
 }
 }
 }
}
That is the code that calculates, in a very basic form, the illuminance.
Create a CMakeLists.txt
Copy the following code in your CMakeLists.txt
cmake_minimum_required(VERSION 2.8.3)
project(gazebo_light_sensor_plugin)

# Load catkin and all dependencies required for this package
find_package(catkin REQUIRED COMPONENTS
roscpp
gazebo_ros
)

# Depend on system install of Gazebo
find_package(gazebo REQUIRED)

link_directories(${GAZEBO_LIBRARY_DIRS})
include_directories(${Boost_INCLUDE_DIR} ${catkin_INCLUDE_DIRS} ${GAZEBO_INCLUDE_DIRS})

add_library(${PROJECT_NAME} src/light_sensor_plugin.cpp)
target_link_libraries(${PROJECT_NAME} ${catkin_LIBRARIES} ${GAZEBO_LIBRARIES} CameraPlugin)

catkin_package(
DEPENDS
roscpp
gazebo_ros
)
Update the package.xml
Now you need to include the following line in your package.xml, between the tags <export></export>
<gazebo_ros plugin_path="${prefix}/lib" gazebo_media_path="${prefix}" />
Now you are ready to compile the plugin. Compilation should generate the library containing the plugin inside your building directory.
Create a world file
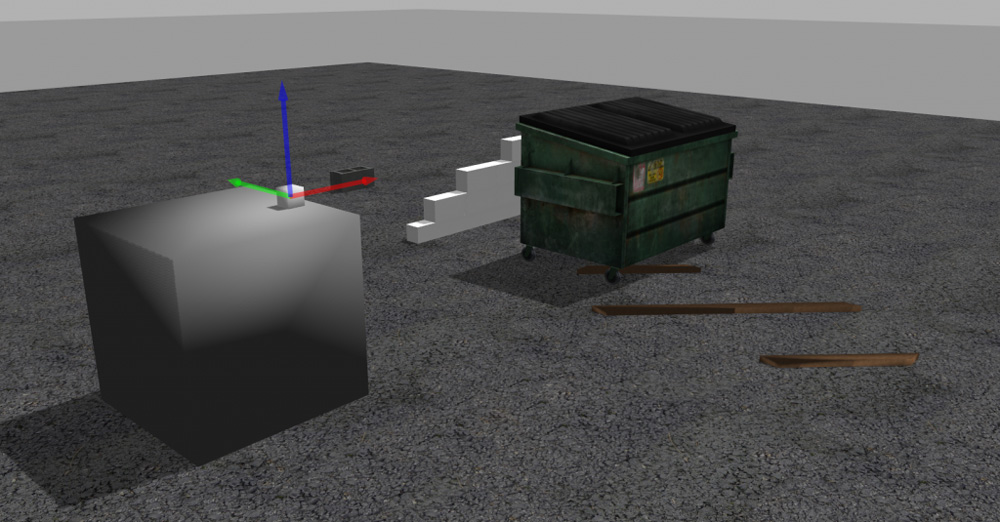
Below is an example of a world file that includes the plugin. Save this code in a file named light.world inside the directory worlds of your package. This world file simply loads the camera with its plugin, so it might be a bit ugly, but it will be good enough for your tests. Feel free to add more elements and models in the world file.
<?xml version="1.0" ?>
<sdf version="1.4">
 <world name="default">
 <include>
 <uri>model://ground_plane</uri>
 </include>

 <include>
 <uri>model://sun</uri>
 </include>

 <!-- reference to your plugin -->
 <model name='camera'>
 <pose>0 -1 0.05 0 -0 0</pose>
 <link name='link'>
 <inertial>
 <mass>0.1</mass>
 <inertia>
 <ixx>1</ixx>
 <ixy>0</ixy>
 <ixz>0</ixz>
 <iyy>1</iyy>
 <iyz>0</iyz>
 <izz>1</izz>
 </inertia>
 </inertial>
 <collision name='collision'>
 <geometry>
 <box>
 <size>0.1 0.1 0.1</size>
 </box>
 </geometry>
 <max_contacts>10</max_contacts>
 <surface>
 <contact>
 <ode/>
 </contact>
 <bounce/>
 <friction>
 <ode/>
 </friction>
 </surface>
 </collision>
 <visual name='visual'>
 <geometry>
 <box>
 <size>0.1 0.1 0.1</size>
 </box>
 </geometry>
 </visual>
 <sensor name='camera' type='camera'>
 <camera name='__default__'>
 <horizontal_fov>1.047</horizontal_fov>
 <image>
 <width>320</width>
 <height>240</height>
 </image>
 <clip>
 <near>0.1</near>
 <far>100</far>
 </clip>
 </camera>
 <plugin name="gazebo_light_sensor_plugin" filename="libgazebo_light_sensor_plugin.so">
 <cameraName>camera</cameraName>
 <alwaysOn>true</alwaysOn>
 <updateRate>10</updateRate>
 <imageTopicName>rgb/image_raw</imageTopicName>
 <depthImageTopicName>depth/image_raw</depthImageTopicName>
 <pointCloudTopicName>depth/points</pointCloudTopicName>
 <cameraInfoTopicName>rgb/camera_info</cameraInfoTopicName>
 <depthImageCameraInfoTopicName>depth/camera_info</depthImageCameraInfoTopicName>
 <frameName>camera_depth_optical_frame</frameName>
 <baseline>0.1</baseline>
 <distortion_k1>0.0</distortion_k1>
 <distortion_k2>0.0</distortion_k2>
 <distortion_k3>0.0</distortion_k3>
 <distortion_t1>0.0</distortion_t1>
 <distortion_t2>0.0</distortion_t2>
 <pointCloudCutoff>0.4</pointCloudCutoff>
 <robotNamespace>/</robotNamespace>
 </plugin>
 </sensor>
 <self_collide>0</self_collide>
 <kinematic>0</kinematic>
 <gravity>1</gravity>
 </link>
 </model>
 </world>
</sdf>
Create a launch file
Now comes the final step: to create a launch that will upload everything for you. Save the following code as main.launch inside the launch directory of your package.
<launch>
 <!-- We resume the logic in empty_world.launch, changing only the name of the world to be launched -->
 <include file="$(find gazebo_ros)/launch/empty_world.launch">
 <arg name="verbose" value="true"/>
 <arg name="world_name" value="$(find gazebo_light_sensor_plugin)/worlds/light.world"/>
 <!-- more default parameters can be changed here -->
 </include>
 </launch>
Ready to run!
Now launch the world. Be sure that a roscore is running or your machine, and that the GAZEBO_PLUGIN_PATH environment var includes the path to the new plugin.
Now execute the following command:
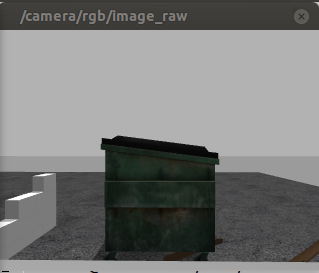
roslaunch gazebo_light_sensor_plugin main.launchYou can see what the camera is observing by running the following command:
rosrun image_view image_view image:=/camera/rgb/image_raw
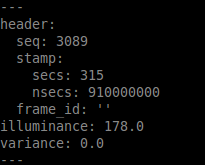
You can also have the value of luminance by watching the published topic:
rostopic echo /gazebo_light_sensor_plugin/lightSensor
Conclusion
Now you have a plugin for your Gazebo simulations that can measure (very roughly) the light detected. You can use it in you local copy of Gazebo or even inside The Construct.
tags: c-Education-DIY, Gazebo, ROS


