
Robohub.org
Outreach activities: Making nanoparticle robots to ‘treat cancer’
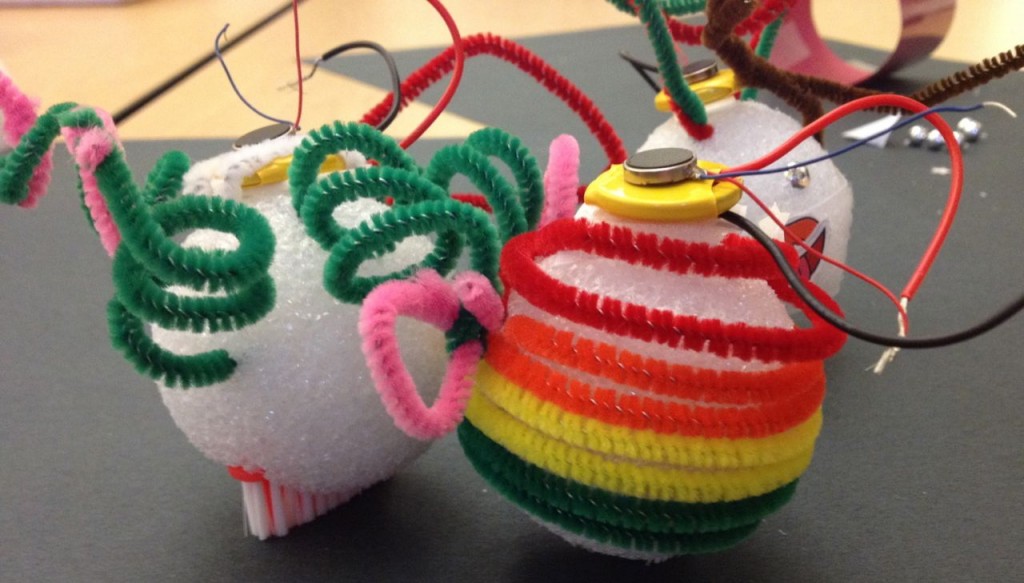
We would always have kids come around the robotics lab where I did my PhD. They would learn about robots and we would show them videos and demos of bio-inspired robots that could fly, jump and swarm. Robots are wonderful to get kids excited about engineering.
Now I’m in a lab that designs nanoparticles to kill tumor cells. So how do you explain tough concepts like cancer and show the invisible? Turns out, robots can help here too. Early December our lab welcomed 30 middle school girls. By the end of the day, each one of them had built and decorated their own nanoparticle robot. Here’s a full tutorial so you can do this at home or in your classroom.
This is intended for middle school kids. For more information about nanomedicine, check our lab’s website, our game NanoDoc, or our most recent research paper.
Explaining Cancer
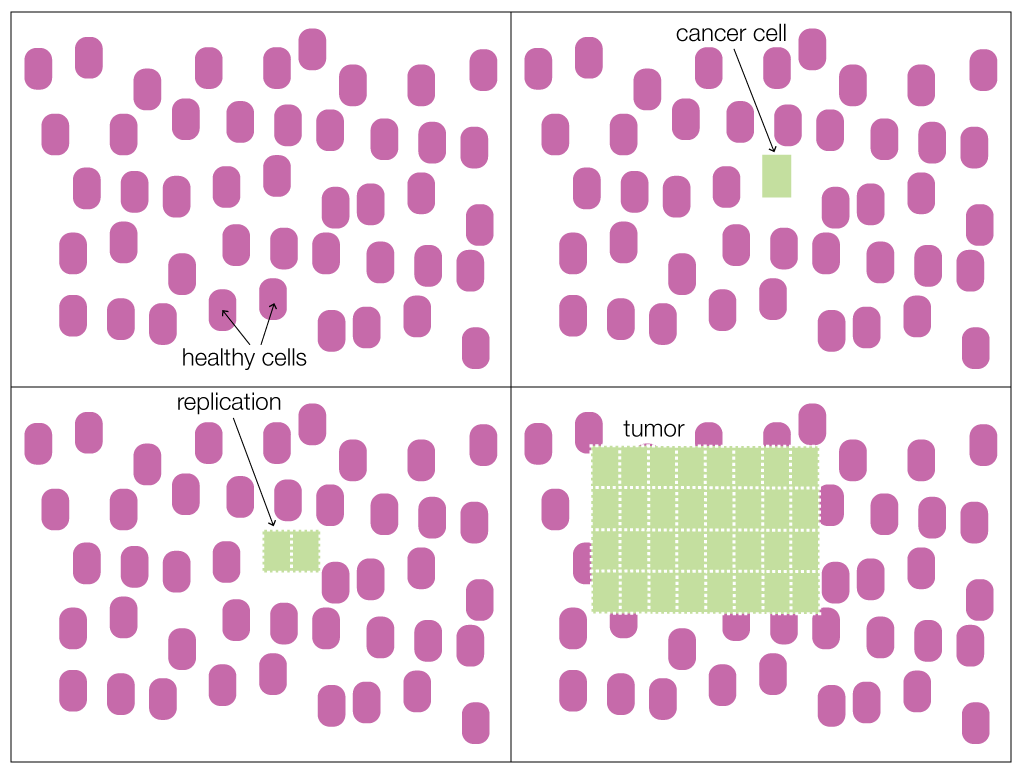
To explain cancer, I use a large sheet of pink paper, cut out lots of ‘healthy’ cells and distribute them over the table. I then take a large sheet of green paper and fold it in half as many times as needed to make a small rectangle the size of the healthy cells, these are the cancer cells. Cancer arises when the program (i.e. the DNA) of one of the healthy cells goes bad. I show this by placing the folded green paper on top of one of the healthy cells. Because of their faulty program, cancer cells replicate uncontrollably. Very quickly they divide (there I unfold the paper with the tumor cell). The two resulting cancer cells double again (unfolding again produces 4 cancer cells). Very quickly, the cancer cells will have taken over the healthy tissue.
Explaining Nanoparticles
To treat cancer, bioengineers are designing nanoparticles that are 100 to 100’000 times smaller than the diameter of a human hair. These nanoparticles are like smart packages that deliver medicine to cancer cells while avoiding healthy cells. Because of their size, nanoparticles can leak out of vessels into tumors. We can make nanoparticles with different, sizes, shapes and materials. Unlike healthy cells, certain types of tumor cells overexpress receptors on their surface. Nanoparticles can be made to bind to these receptors, that is how they recognize tumor cells. To illustrate this, I show them this video without the sound from 0:25 to 0:53.
The Activity
The kids’ mission is to design a nanoparticle robot that is able to bind to a cancer cell. The nanoparticle robots leak out of the vessel into the tumor. They can change the size of the nanoparticle robot to change how fast it moves (think diffusion) and they can decorate their nanoparticle with Velcro to bind to cancer cells.
The tumor arena where they test their nanoparticle robots has the following items:
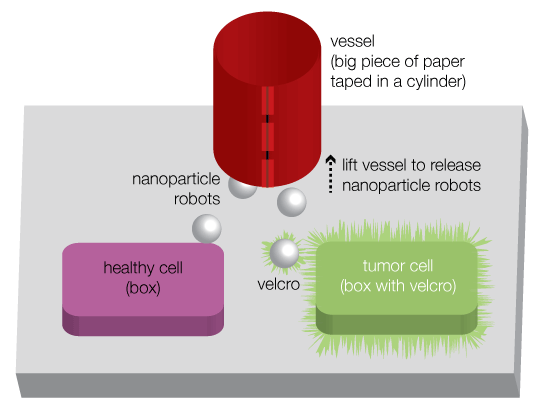
1) Vessel: A large piece of red paper. Tape the edges to make a cylinder. Nanoparticle robots will be placed in the vessel. To release the nanoparticle robots, just lift the piece of paper.
2) Healthy cell: A box with a pink piece of paper on it.
3) Tumor cell: A box with a green piece of paper on it. This cancer cell overexpresses receptors, which we show by placing Velcro all around it.
To make 12 Nanoparticle robots you’ll need the following items. Besides the robots, I found everything at my local arts & crafts shop. It costs between 4$ and 10$ per kid to do this demo.
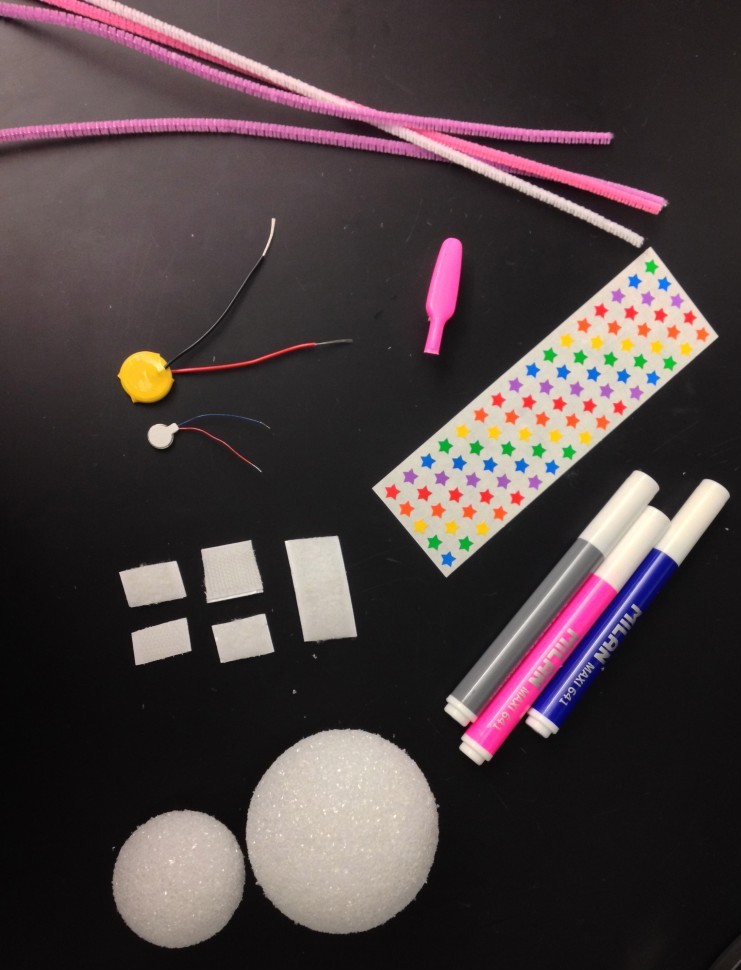
1) A BrushBot party kit (12 robots)
2) 12 Styrofoam balls (1.5 inch to 2.5 inches in diameter)
3) White velcro with a sticky-back
4) Decoration material including colored pipe-cleaners, markers, and star stickers.
We placed all this material on the table and the kids gathered around. To build the robots follow these steps:
1) Cut the toothbrushes in the BrushBot kit with pliers. We prepared this before the kids arrived.
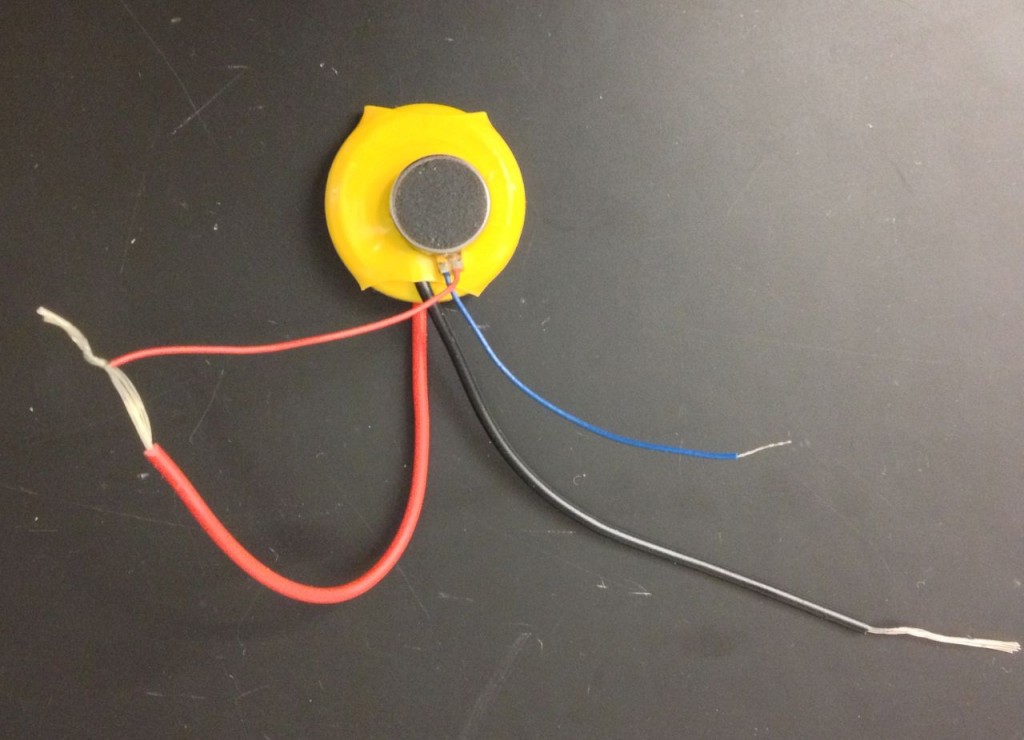
2) Strip the wires of the battery (yellow thing with cables in the Brushbot kit) so that 1 cm of the metal wire is showing. We prepared this before the kids arrived. Warning: make sure the wires of the batteries do not touch! If you need to store your battery, tape the nude wires.
3) Make a hole in the foam ball the size of the brushes. You can do this before the kids arrive using a razor blade (be careful!). You can also let the kids do it themselves with their fingers, although this will make a big mess.
4) Add some Velcro to the top of the brush and inside the hole of the sphere. Place the brush in the hole. Check to see if the ball can balance on the brush and adjust as necessary.
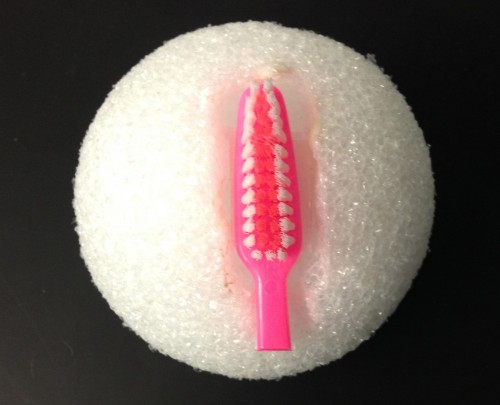
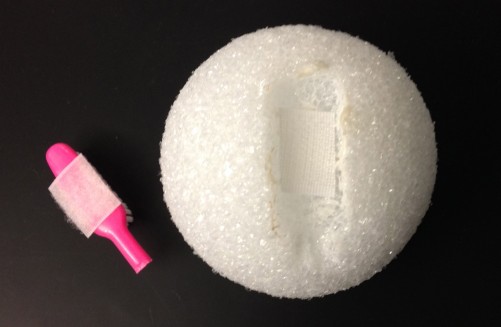
5) Take a vibrating motor (small metallic thing with wires in the BrushBot kit) and remove its sticker-back. Stick the motor on the yellow battery.
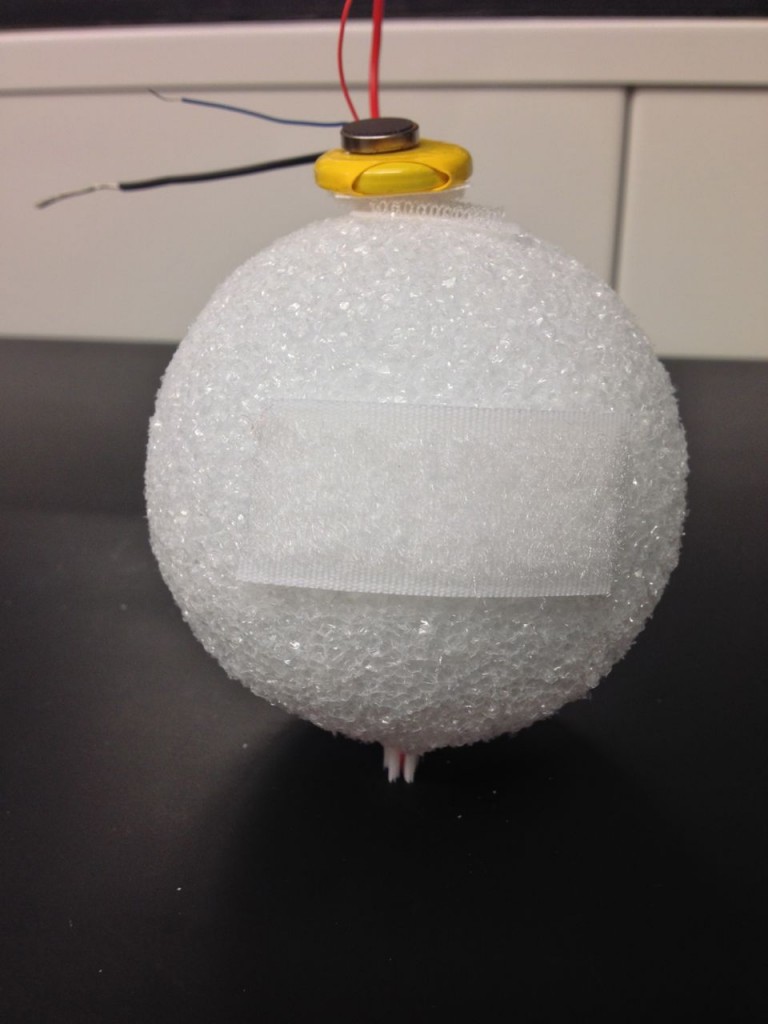
6) Place some Velcro on top of the sphere and Velcro the yellow battery to it.
7) Twist the cables of the battery and vibrating motor together. You can show them how to do this by using the pipe-cleaners as an example. Each fat wire from the battery should be twisted with one thin wire from the motor. At this point, the robot should start vibrating.
8) Add a piece of Velcro to the side of the robot so it can bind to the receptors of the cancer cells.
9) Decorate your nanoparticle so it looks awesome, I like to say the star stickers are markers that make the nanoparticles florescent. That’s how researchers can see them with a microscope. The decoration phase is really important to engage the kids, don’t worry if they spend most of their time on this part.
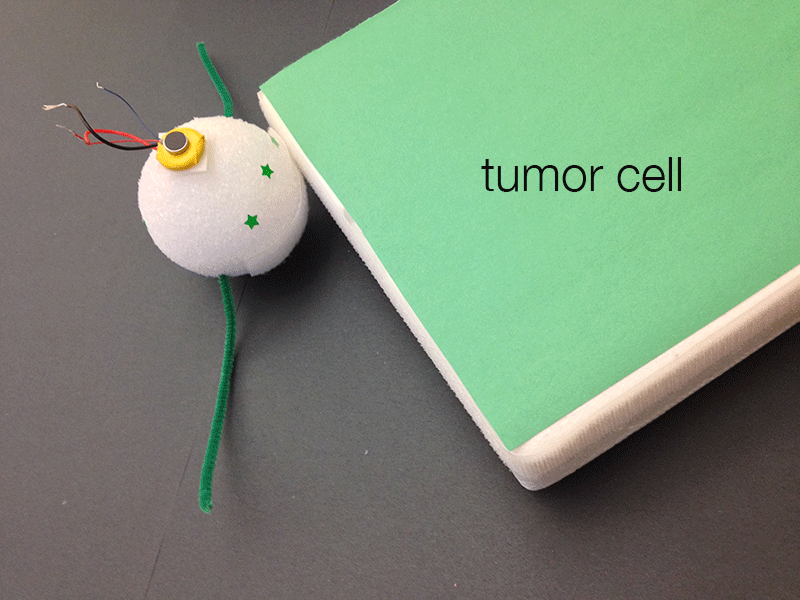
10) Place the robots in the vessel (one after the other or all together) and release them by lifting the paper. Let the robots diffuse until they are able to find and bind to a cancer cell. Cheer profusely when successful, iterate when not. Here is a short video of what the robots look like when they move.
http://youtu.be/cxGNtK8h1WE
That’s it! Don’t be surprised if some of them put the vibrating BrushBot on their teeth (think DIY electric toothbrush). The fun thing with this demo is that the kids can go home with their nanoparticle robot.
A special thanks to the Nagpal Lab for the inspiration behind this activity. Ideas, questions and feedback are very welcome in the comments section below.
tags: c-Education-DIY, cx-Health-Medicine, Nanoparticles, Swarming


